Part 2
More about Planking
There are many stages to fitting each strake: planing the 'landing' and cutting the gerald on the board below, spiling the shape, transferring the pattern onto a suitable board (scarfing two boards together if necessary), sometimes steaming the ends of the cut strake, fitting the strake into the geralds of the board below, and finally fixing it in place with nails and roves. As a first-timer at each of these procedures there was a fairly steep learning curve and initial progress was slow. However, although I would never make any money as a boatbuilder, I did speed up over time and found it both enjoyable and rewarding. I'll describe my experiences with each of these processes in a little more detail.
Planing the Landings and cutting the Geralds
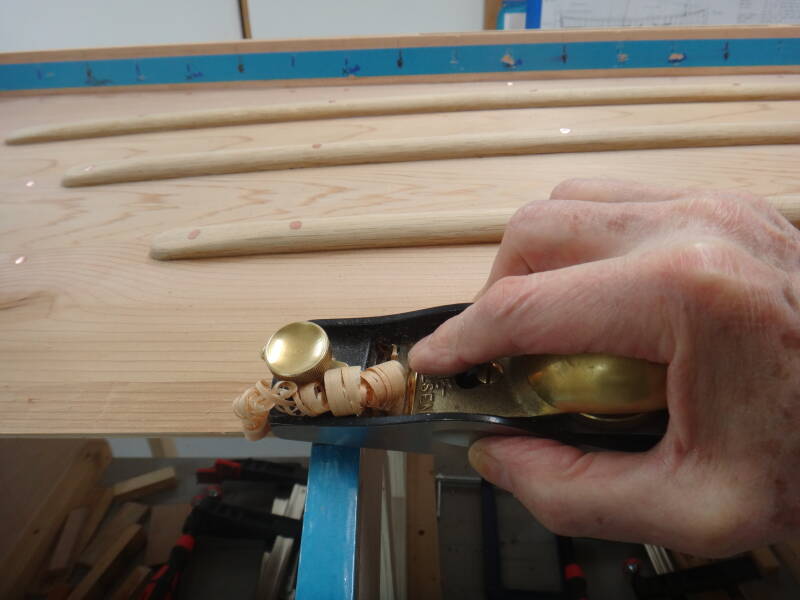
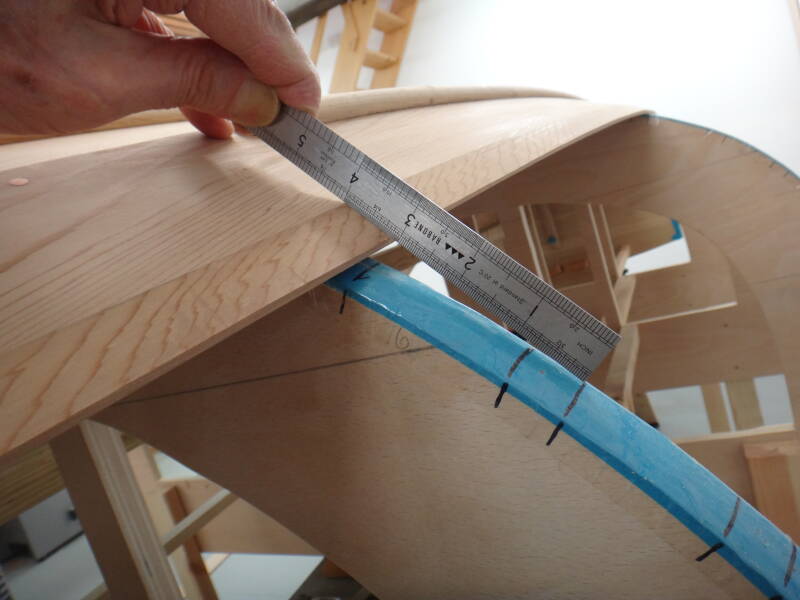
Getting a flat landing surface for the strake to sit on is obviously critical for reducing the chances of leaks. I found a block plane easiest for the job, and the soft cedar allowed the production of some very satisfying shavings. Laying a metal rule across the landing and full width of the strake detects any errors in the angle at each station. I found that filling in the gaps between the stations with a consistent rolling bevel was more tricky.
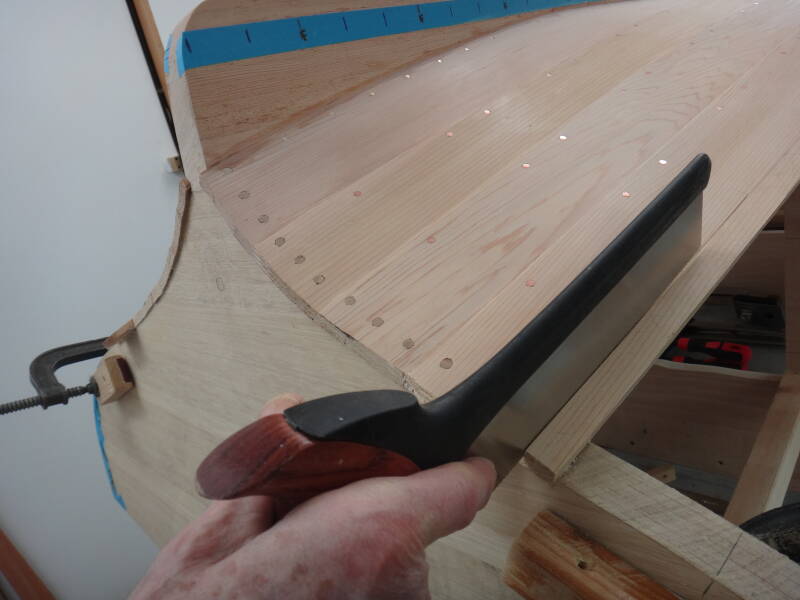
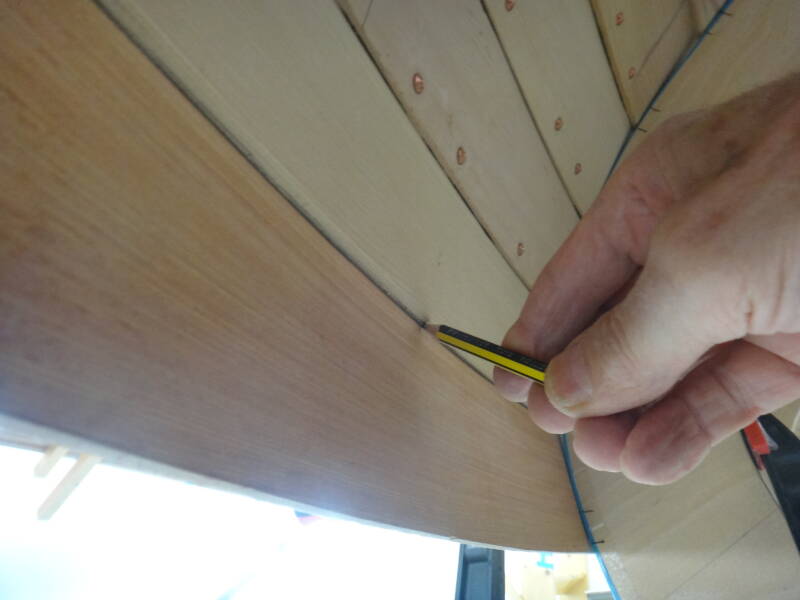
Where the landings blend into the geralds at the stem and transom, progressively eliminating the overlap over about 10 inches, it seems easiest to get a straight sharp edge with a saw. Once the strake is on the boat and curved, it made it very difficult to use the rebate plane bought for the purpose, so I used a normal shoulder plane which worked well. I think I should have cut the rebates when the timber was flat and on the bench, but as many of the strakes needed trimming and adjusting after steaming, I wasn't certain where to make the cuts. I'm sure experience would solve this problem, but It worked OK my way, even if more time consuming.

Spiling, Scarfing and Steaming
As described before, I used 3mm ply for the spiling board - used to make a pattern of the shape needed for the strake. To accommodate the curvature, two strips of ply were joined at an angle with some hot melt glue, and then clamped over the landings. The shape of the bottom edge of the landing was scribed on the spiling board from underneath with a pencil.
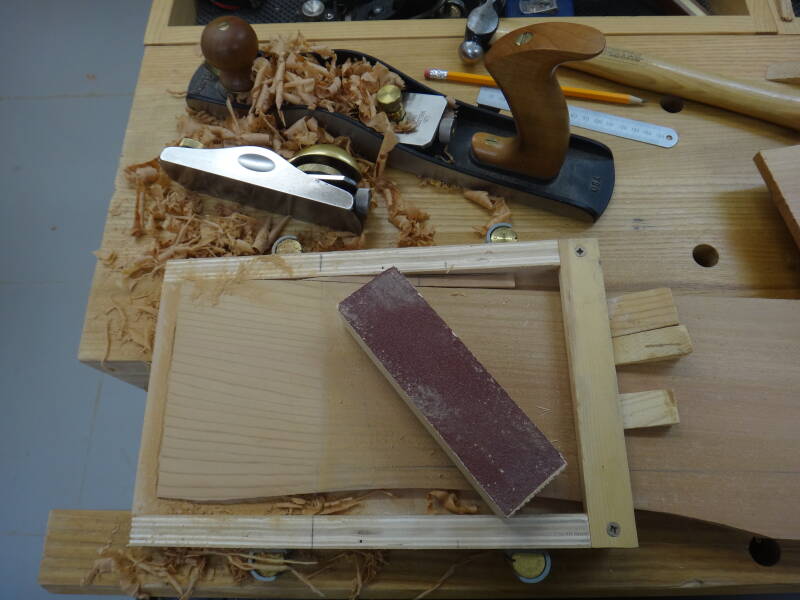
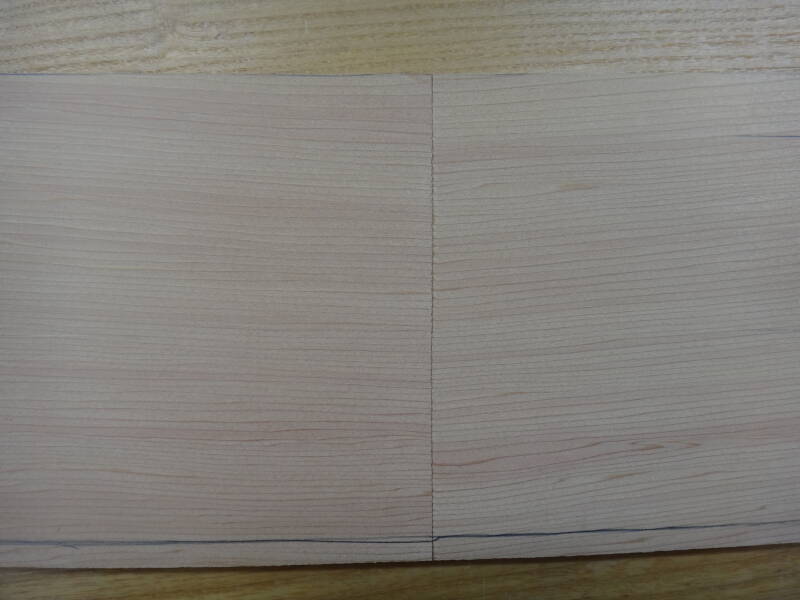
That shape was then transferred onto the cedar plank, together with measurements showing the planned width of the strake at each station - these were joined with a fairing baton. I spent a lot of time choosing the most suitable cedar board that would accomodate the strake and allow me to avoid any defects in the wood. I had hoped that with 10 inch wide boards most of the curvature of the strakes would be accomodated, but this proved not to be the case and I had to put a scarf joint in four strakes on each side, numbers 3, 4, 5, & 6. I made a scarfing box for a 1:12 bevel and used planes and a sanding block for a smooth surface. I bonded the joints with epoxy and they became better with practice - I'll just show you one of the best! I found that keeping the correct angle between the two sections of the strake was tricky, requiring reference lines on each piece.
Steaming the strake was needed at both stem and transom for the first five strakes, and I continued to use it at the stem through to number 8. I could probably have done less but thought it was helpful to take some of the tension out of the wood, and it was certainly easier to hold the strake in place when fitting and making adjustments. I am a convert to the 'boil in a bag' method.

Fixing the strakes
In my ongoing quest for a non-leaky boat I continued to follow Will Stirling's advice to use a little glue at the end of the geralds, and Ian Smith's advice that some Sikaflex on the landings was permissable. If it results in splits in the cedar later in life, I'll let them know. I found it easy to put two thin lines of Sikaflex along the landings and because it sets very slowly (but remains flexible) there was no rush when clamping on the strake. I left it clamped overnight.
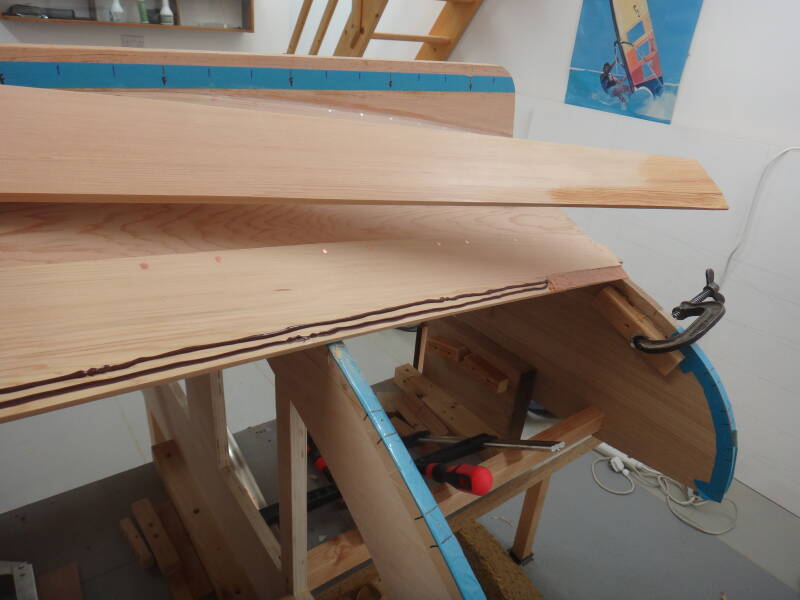
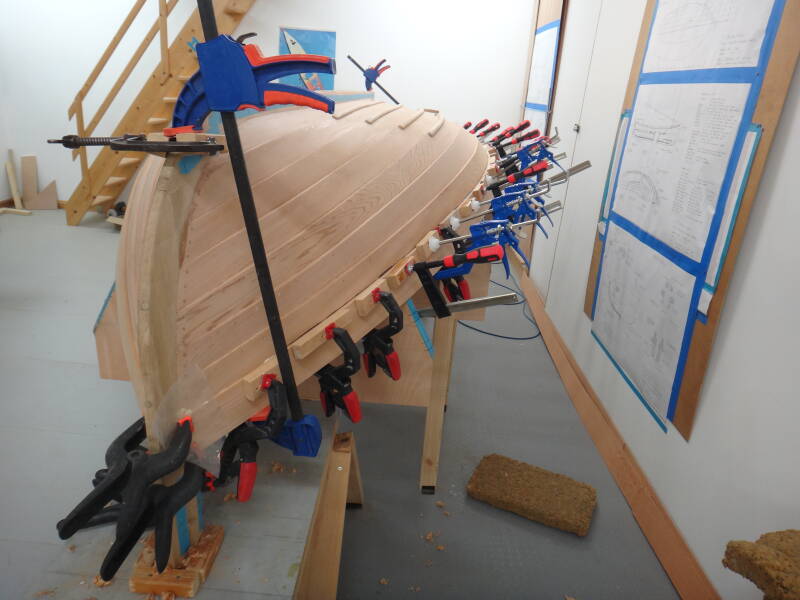
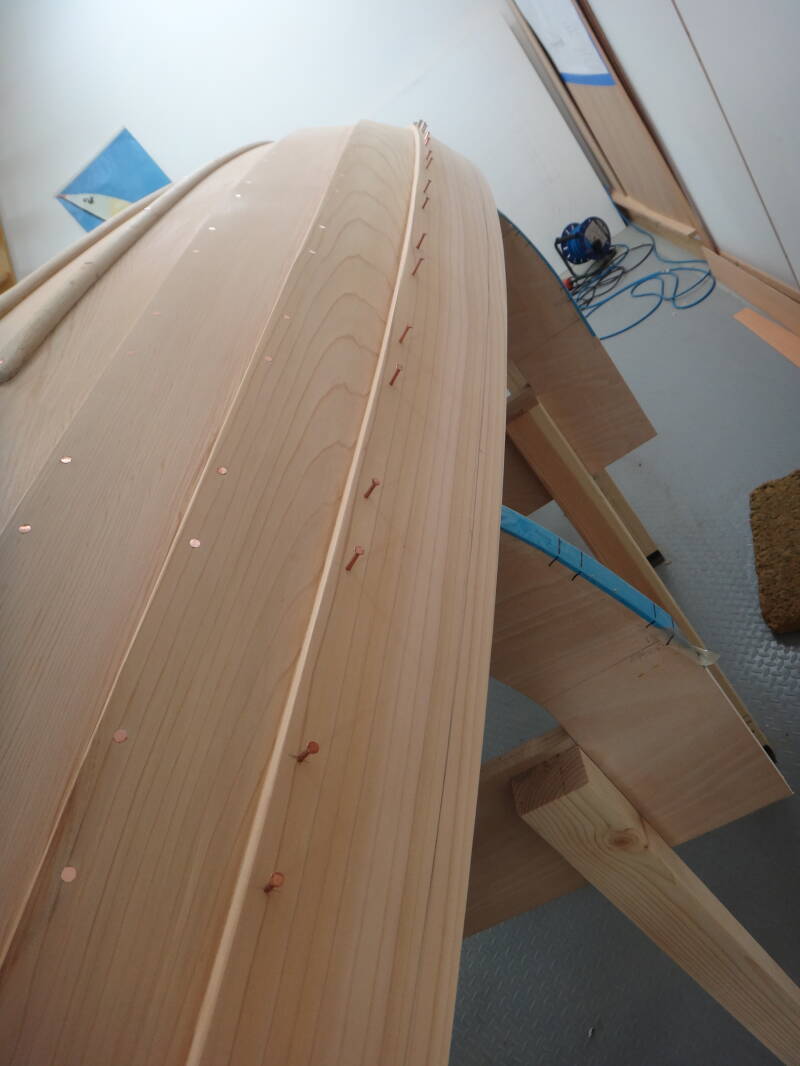
Then the fixing with copper nails and roves. I attempted to keep the lines of copper nails straight, leaving gaps in the right places for the frames to be nailed in later. All the nail holes were pre-drilled to try to avoid any splits round the hole on the inside. Putting on the roves on the inside of an upturned boat is challenging, and the cutting and peening-over of the nails, even more so. In his book 'Wooden Boatbuilding' Ian Smith says that unless you are a masochist or building a boat right way up, don't attempt to rove over the nails at this stage - but he also says that the boat will remain 'quite floppy'. I didn't like the sound of that so thought I would try to peen over most of the nails from underneath as I went along. I didn't find it too bad, which must therefore say something about my character, and it has reduced the need to enlist my wife's assistance with the hard to reach roves at a later stage!
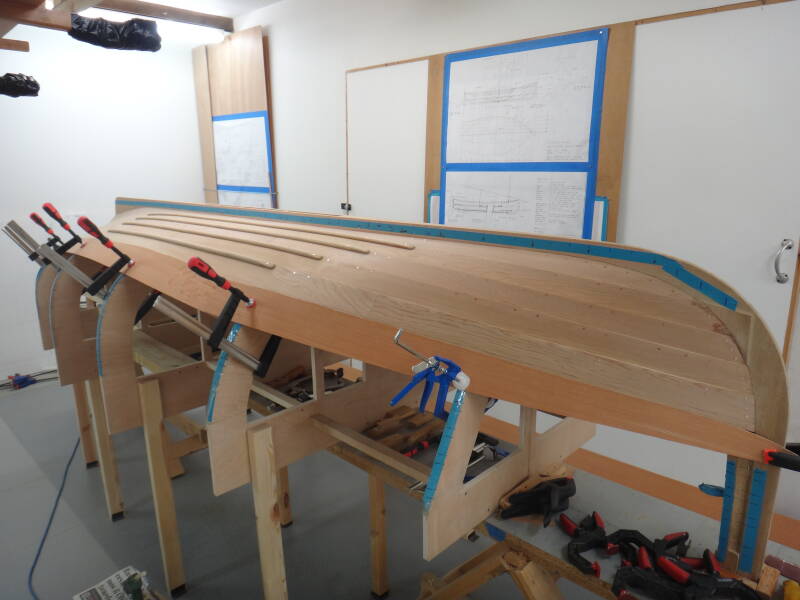
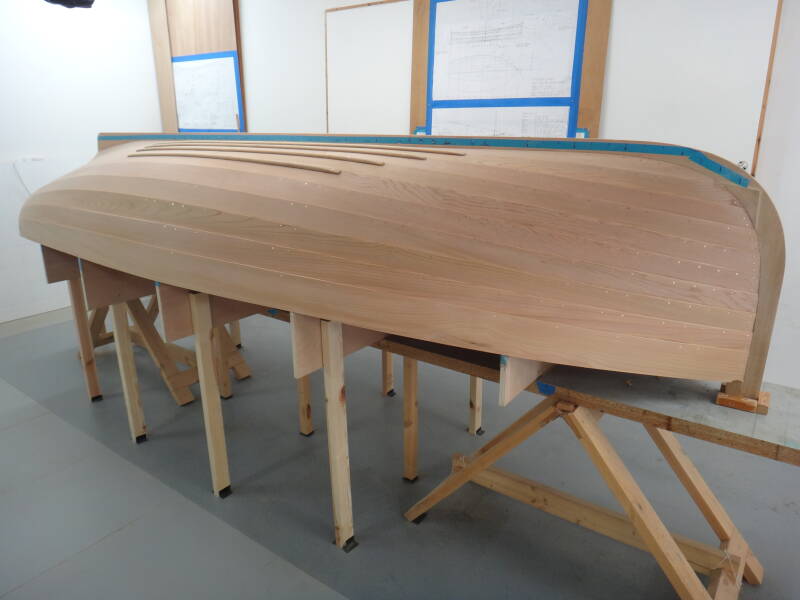
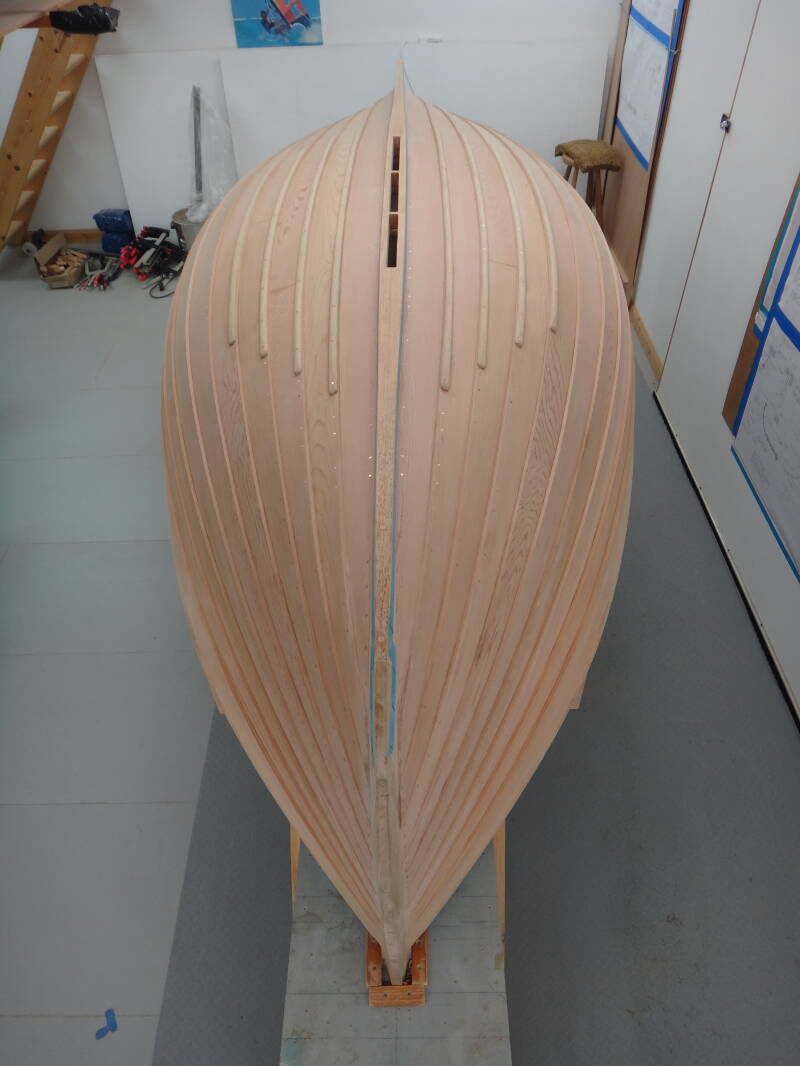
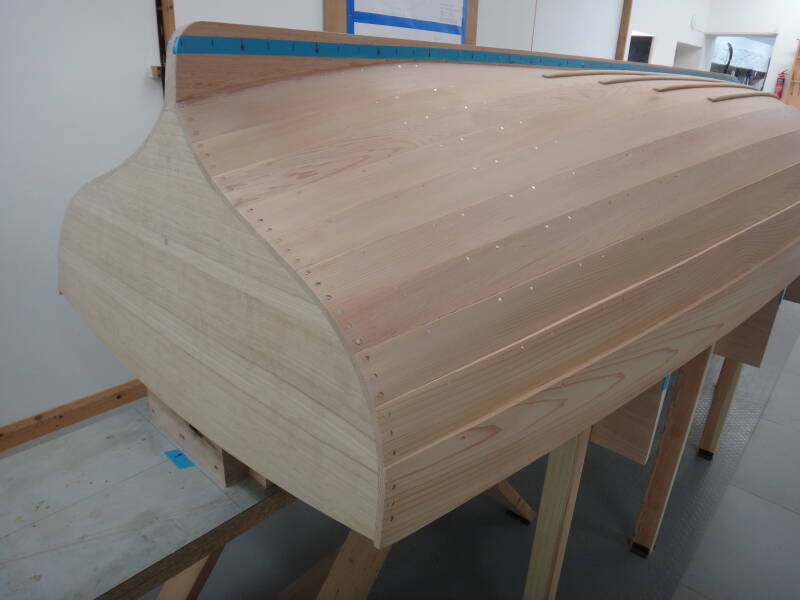
The final strake, the sheer strake, is wider than the others so that it will look balanced when the rubrails are added on top. It's a great sense of satisfaction when all 10 strakes are in place although, as builder, you notice the imperfections where things could have been done better. It is a shame that skills develop slowly over the course of a build and aren't there when doing the first few strakes, which in terms of keeping the water out are the most critical. The next boat might be better!

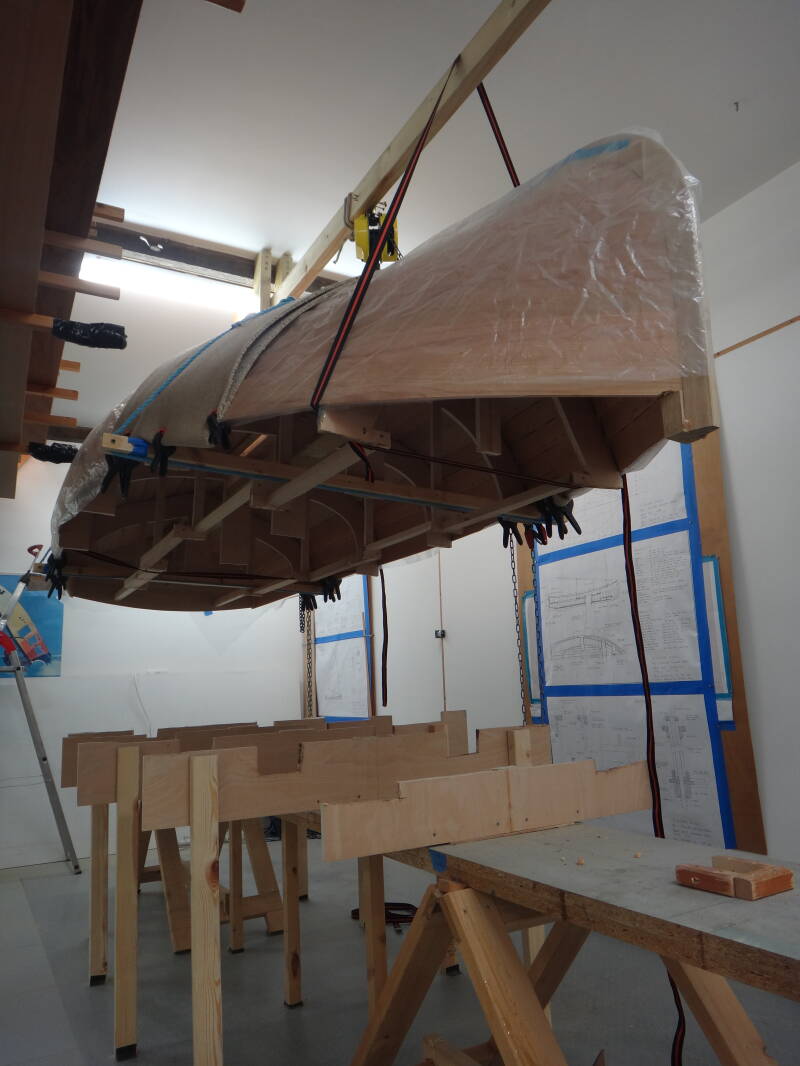
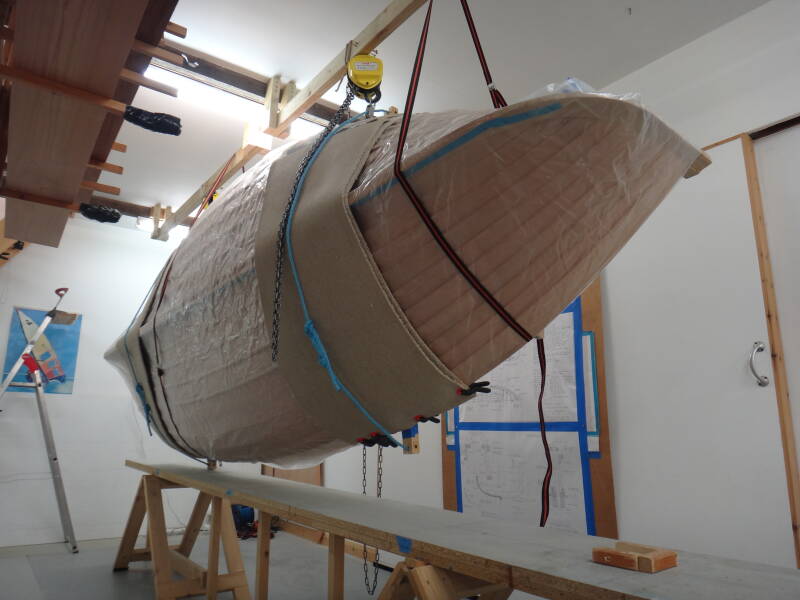
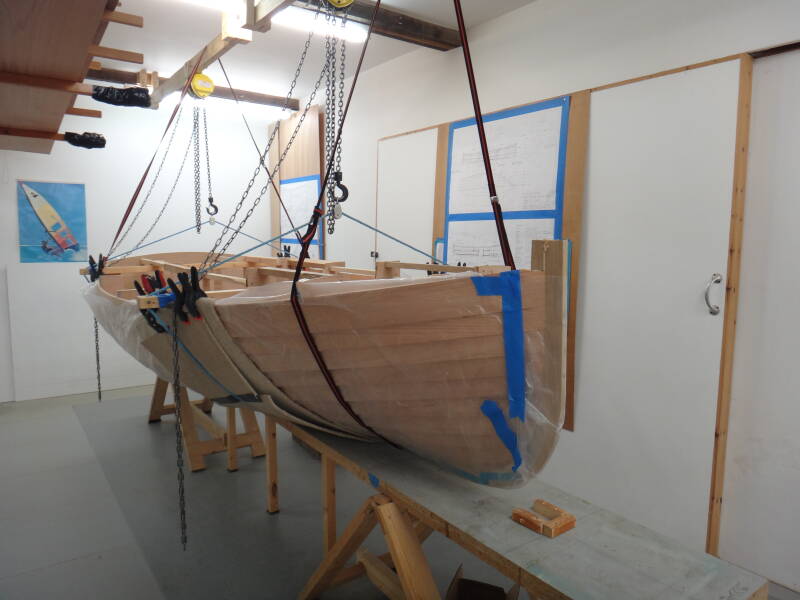
Flipping the boat
I confess that I approached this stage with some trepidation as I was planning to flip the boat over on my own. Interestingly I found several descriptions and videos of different boat flipping methods online, but few for a single-handed operator. Nevertheless I picked up some useful ideas and purchased two chain hoists to attach to beams I had fixed to the ceiling before starting the build. The low-cost hoists arrived with the chains liberally coated in oil, and despite a prolonged paraffin wash I was concerned about the risk of getting oil on my bare wood, so I covered the boat with a polythene sheet. The idea was to place two ropes around the boat that would pass through pulleys attached to the hoists and, after lifting, the boat would be rotated with the ropes. I was anxious to avoid any damage to the soft cedar from the ropes, so two layers of old carpet were added as protection. I also thought that any distortion of the boat shape could be avoided by leaving most of the building station frames inside the boat and only removing them in stages later, as they were replaced by the permanent timber frames. I added two temporary crossbeams, fixed to appropriate station frames, with slots in the end to keep the ropes in position.
So, after a lot of thought, I tensioned the ropes, cut across the station frames at gunwale level, and lifted the boat. The fear of something breaking led me to add two extra 'safety' straps, but all worked surprisingly smoothly.

A brief time-lapse video of the boat flip is available here: https://www.youtube.com/watch?v=VfdnwgEDk2o
It's an exciting moment to get the first proper look at the inside of the boat. I now need to make some new cradles to support the sides of the boat in its new position.

Create Your Own Website With Webador