Part 5
Continuing the fit-out
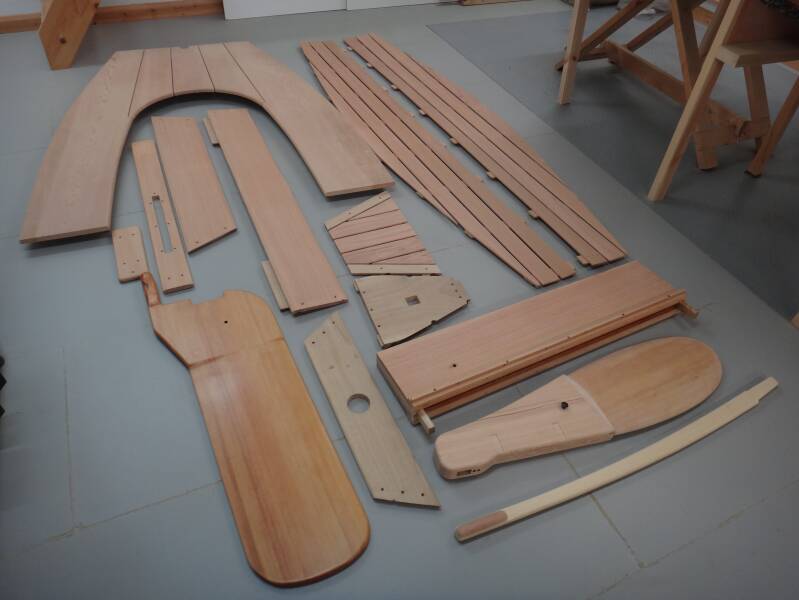
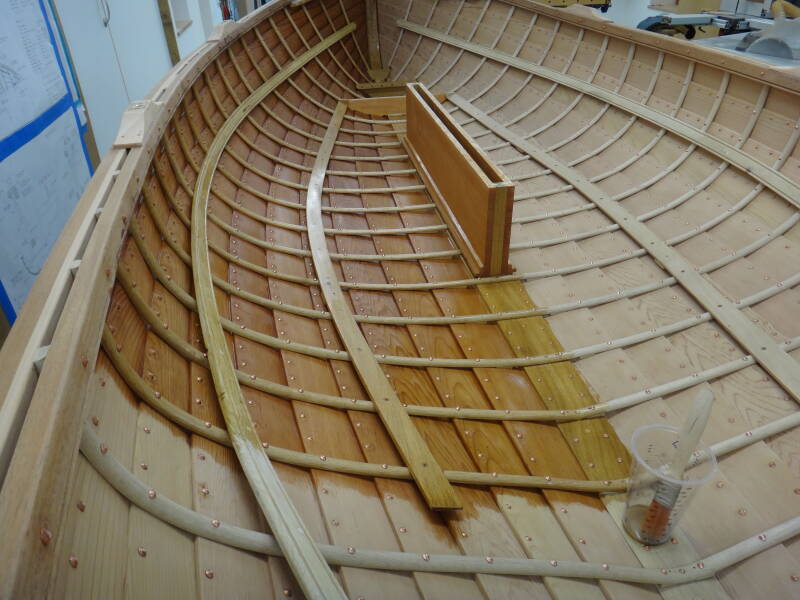
Floorboards
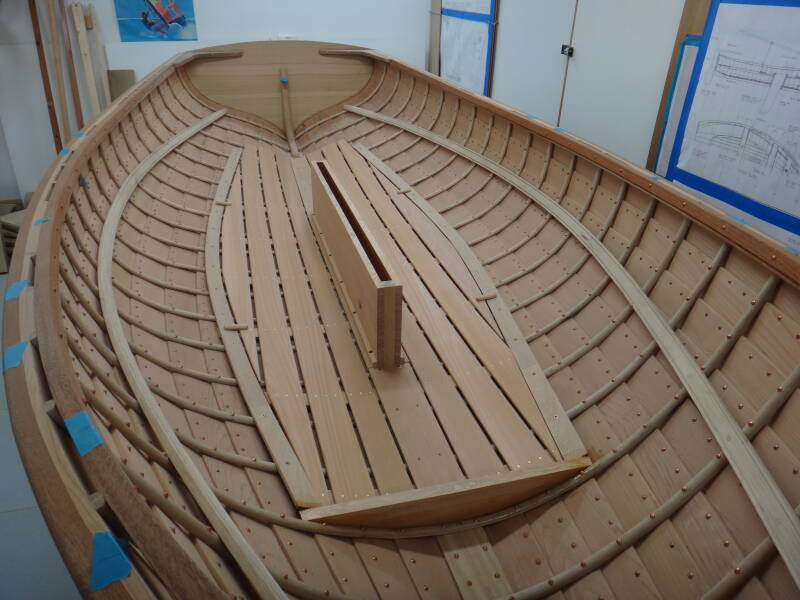
The cedar floorboards sit on the oak frames, with the centre plank being screwed in position in front of and behind the centreboard casing. The remaining boards are held together from underneath by a series of cedar ‘straps’ that tuck below the central plank and are steam-bent to take up the approximate shape of the hull.
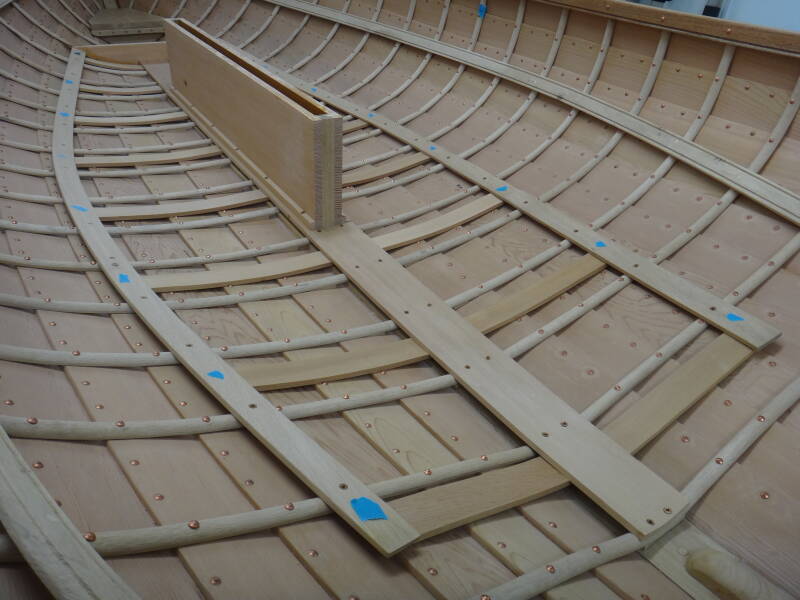
The centre plank screwed in place and a series of steam-bent cedar 'straps' that were used to join the other floorboards together.
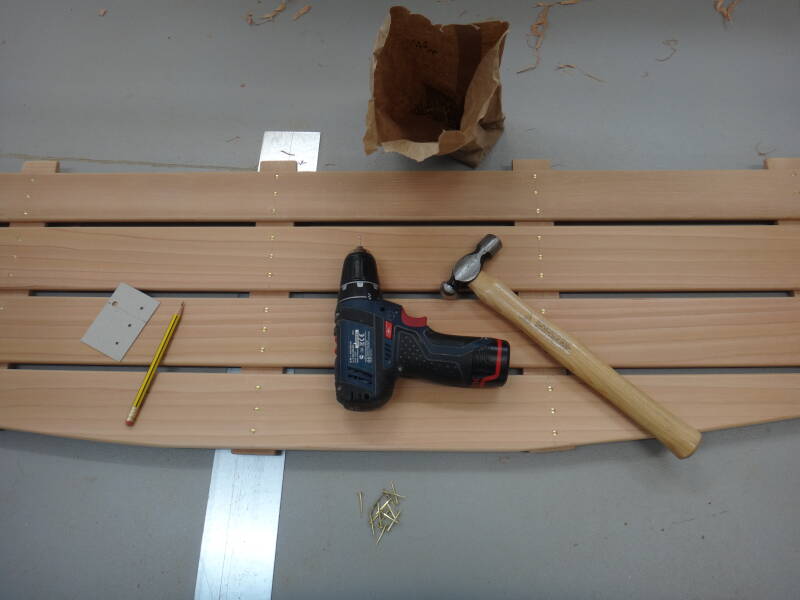
To join the floorboards to the straps I used some 22mm (7/8”) brass clench nails I had left over from a previous canoe build in which they were used to join ribs and planks. These have a very fine tip which bends over when meeting an obstruction, clenching the wood together. For this job I put a strip of metal on the floor beneath the joints, marked out and pre-drilled the holes to prevent splitting, and used three nails at each junction. I think it looks smart and seems pretty secure.
The connected floorboards were then sprung into place and held down with two toggles on each side.
The front section of raised floorboard was made to match the same pattern, with cedar in the centre and oak at the sides, and also held in place by toggles.
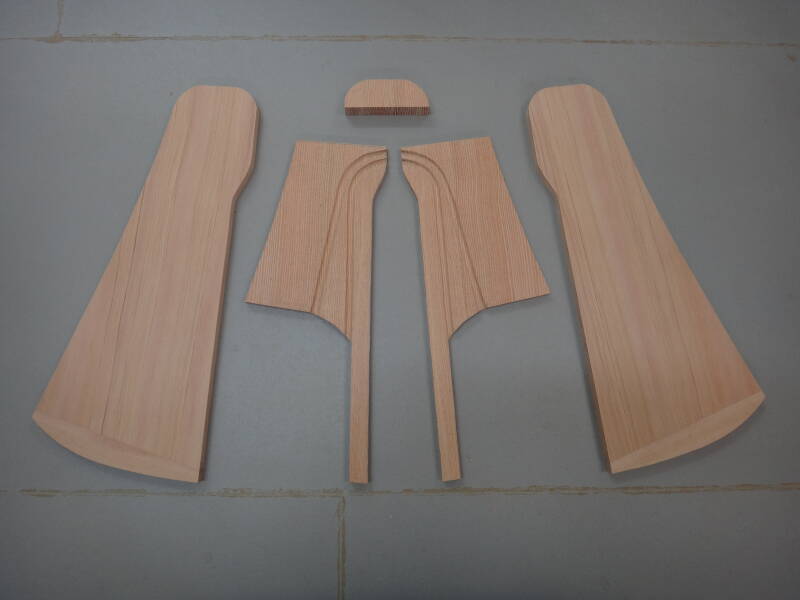
Thwart Knees
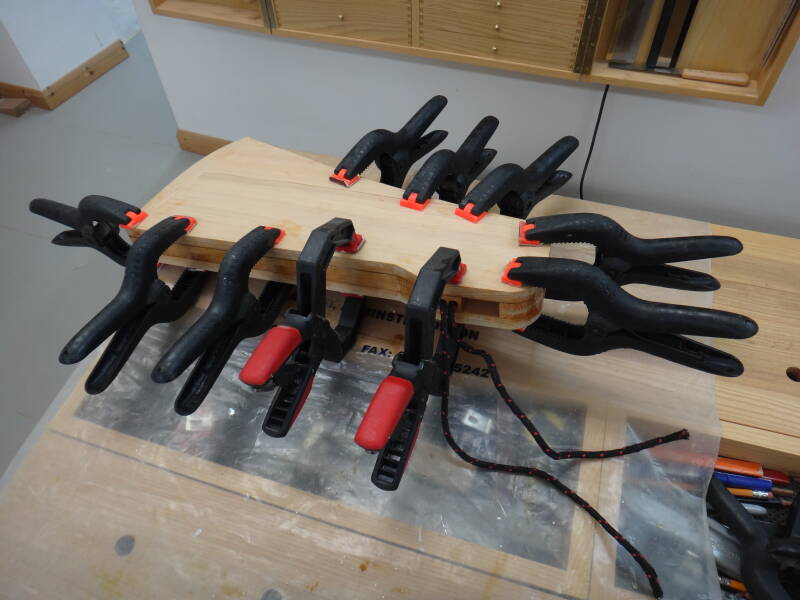
I hadn’t been able to find enough suitably grained oak for the eight thwart knees and had been admiring the laminated knees on several other craft, so thought I’d give that method a go. After using cardboard templates to design a suitable shape for each thwart, I used ten 2mm (3/32”) strips of khaya mahogany, liberally coated with epoxy, and squeezed between a curved former and a cedar backing piece. It worked well and seems to have made light but stiff knees which were then fitted to the sides of the boat on each thwart.
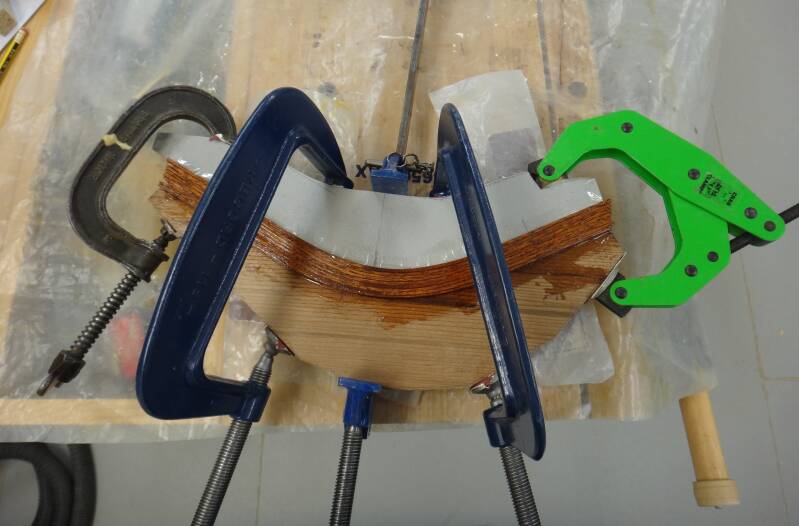
Above: Laminated strips of mahogany coated in epoxy and clamped between a former (protected with clear tape) and cedar backing piece.
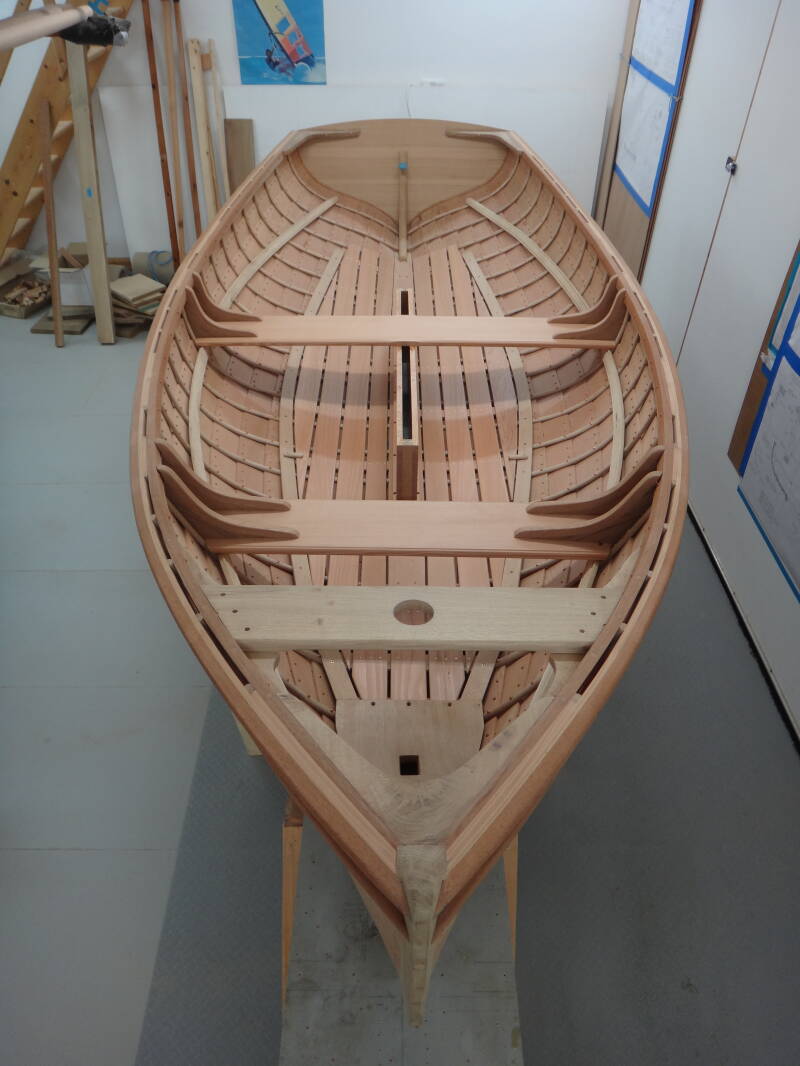
Right: This picture shows the thwarts and knees in place. The oak mast bench and supporting oak brace have also been fitted temporarily, allowing the position of the mast to be marked up on the underlying mast step, and a suitable hole cut. All of these parts were fitted but not fixed, as they needed to be removed again before starting the varnishing.
The Sternsheets (Seating)
The design is for removable 25mm (1”) thick cedar seating, featuring an attractive curved shape which I marked out using a strip of flexible Perspex.
The boards sit on the risings and oak battens fixed to the transom and rear thwart. They are held together and strengthened by oak supports underneath, which were shaped to rest on ribs at the sides of the hull. The plan suggests that the seating should be ‘loose’ but I had visions that if (when) I capsize, it could float off into the distance, so I have added toggles to secure it at the stern and thwart.

A Perspex strip being used to mark out the curve of the seating.
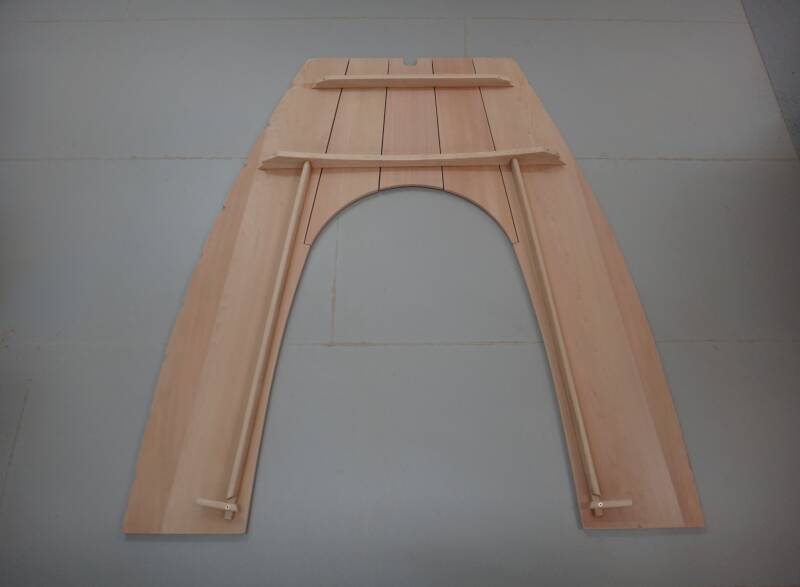
The underneath of the seating showing the oak supports.
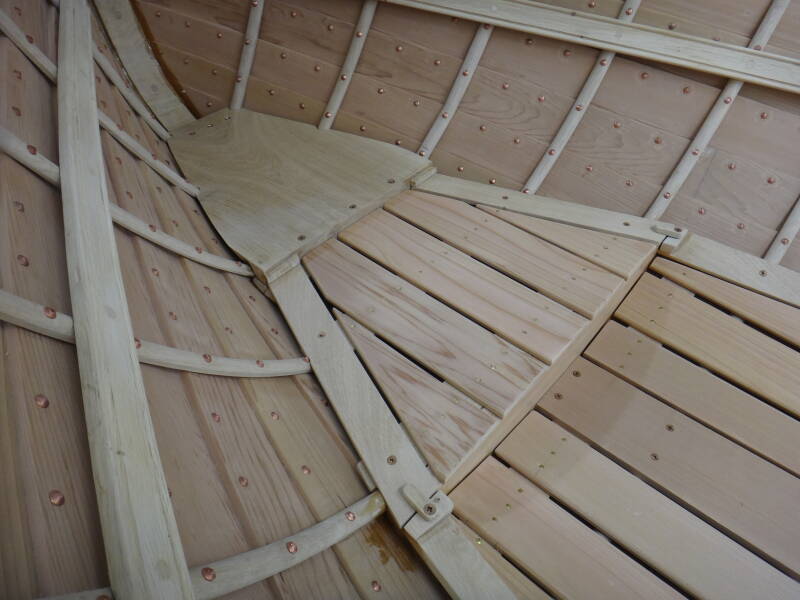
There were a couple of other additions needed for the hull. Firstly, two pairs of rowlock blocks, and I made these from douglas fir as I had run out of large enough blocks of oak. They should be strong enough for my feeble rowing skills; they were glued and nailed to the gunwales. Secondly, I needed to make a centreboard casing top which was fitted each side of the rear thwart, and also fixed underneath the front thwart for additional support.
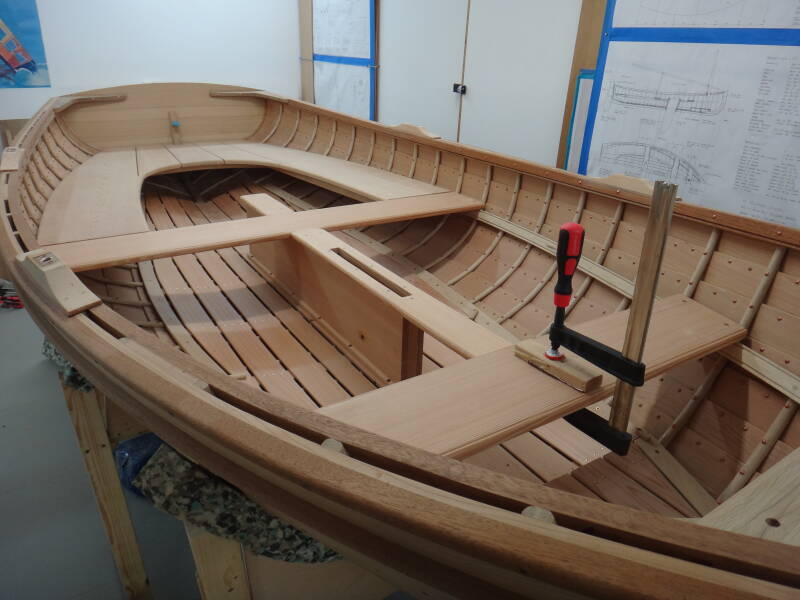
Rowlock blocks and centreboard casing top in place, temporarily clamped to the front thwart.
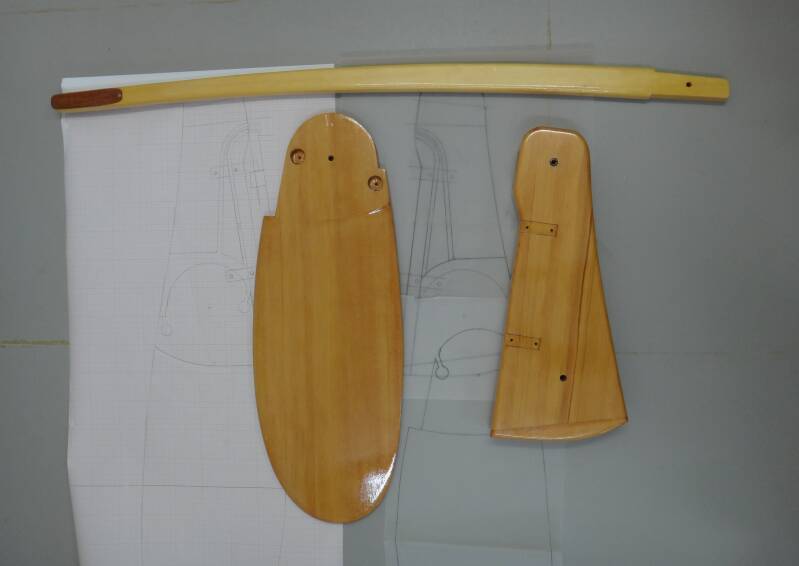
Rudder assembly
The original plans for the boat had a fixed rudder but I was keen to fit a lifting blade that would be less vulnerable. Paul Gartside kindly provided me with suitable plans from a different boat, and predictably I modified these! I wanted to have control lines to both lift and hold down the blade, and have these lines run through the rudder stock. I also wanted the lines to be cleated on the inside of the transom, with an auto-release for the hold-down in case of hitting something underwater. The important thing to remember when designing the rudder stock shape is that the exit point for the lines must align precisely with the axis of rotation of the rudder pintles, so that turning the rudder doesn’t change the tension on the lines. The alternative would have been to attach both control lines to the tiller but I thought that might be a nuisance.
This picture shows the component parts of the rudder stock ready to be sandwiched together, with the grooves for the control lines cut in the central core pieces. On a similar wooden rudder stock for a previous boat I found that over time the sides distorted, so I added ‘breadboard ends’ to the bottom edges in an attempt to prevent this from happening.
The rudder stock was bonded together using epoxy. Scrap pieces of rope were placed in the control line channels so that they could be pulled through to clear any excess adhesive.
The rudder blade was shaped in a similar way to the centreboard, this time using NACA 0012 foil templates, and again sheathed in glass and epoxy to minimise potential distortion.
I made the tiller from a nice piece of Alaskan yellow cedar, with some mahogany to broaden and decorate the end of the handle. I managed to find a drop-nose clevis pin of the right length to secure the tiller into the rudder stock.
Overall, the rudder assembly was a time-consuming construction, starting with full-sized drawings and tracing shapes onto each of the components, but it has been a satisfying part of the project.
The tidy-up!
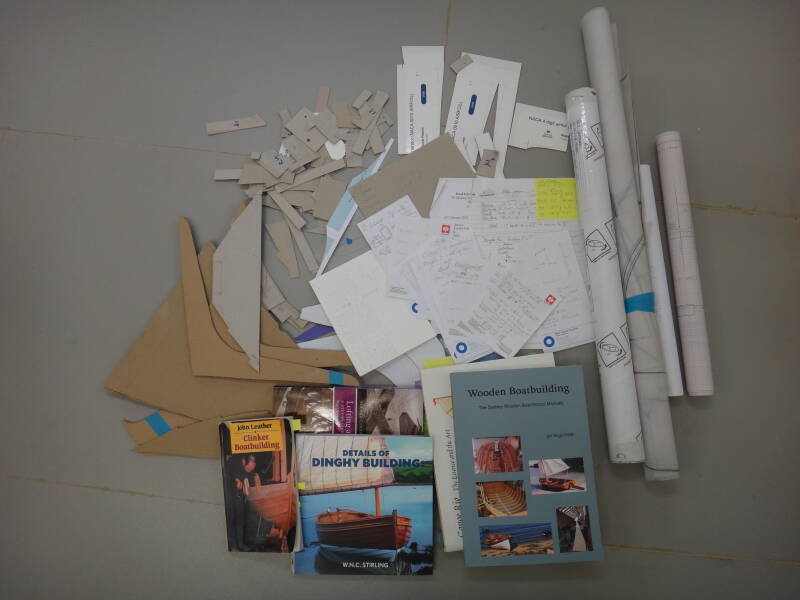
Before starting any varnishing, I had the daunting task of tidying and cleaning up the workshop and assessing what to keep from the pile of timber offcuts that ‘might come in useful’. I also cleared my workbench of the vast pile of books, cardboard templates, plans, and notes of various calculations that had accumulated over many months.
After the first sweep I disassembled all of the fitted furniture from the boat, ready for a final sanding. As emphasised in this picture, there was quite a lot that had been made after completing the hull.
Varnish
In any woodworking project I think one of the most exciting moments is the first application of a finish, in this case varnish, as the true colour and beauty of the wood comes to life. The workshop became a pungent varnishing area with components hanging from ropes, and plastic sheets on the floor. I strongly recommend use of a vapour mask which I find surprisingly effective, along with trying to maintain air circulation. Interestingly, this seems particularly important when varnishing the inside of a boat as the solvent vapour settles inside the hull and dramatically slows the drying unless it is displaced – I used a small fan above the transom to keep the air moving.
The first very thin coat of varnish brings out the rich colour of the western red cedar and contrasts nicely with the oak and douglas fir.

Bits hanging everywhere and a fan on the hull transom!
Reflections so far
Now that most of the woodwork is complete I am starting to reflect on my experiences as a single-handed first-timer using traditional clinker-building methods. Without doubt it has been my most challenging build so far, but in some ways also the most enjoyable. Although I have used machines for some of the work, a higher proportion has required the used of hand tools, and this is quieter, less dusty and more rewarding. With a bit of ingenuity (and a lot of clamps) it is possible to use this type of construction when working single-handed – well almost as I needed to recruit my wife to back up about 60 of the 1,600 copper roves. I’m sure many traditional clinker dinghies have been made by single-handed professionals over the years, and I have great admiration for their skills. I also have great sympathy with the difficulties of trying to make a living by making and selling this type of boat, as many hours of work are involved. For me it has just been fun with no pressure, but the cost of materials alone exceeds the cost of many new GRP boats, without factoring in the time spent on labour. So, if you want a beautiful traditional wooden boat you have to be prepared to make it yourself or pay a premium price!
Next time: Finishing the finishing, rigging and getting out on the water.
Create Your Own Website With Webador