Part 6
Finishing and floating.
The temptation to go sailing and canoeing in the warm spring weather slowed my dinghy build progress, and there were also numerous ‘little jobs’ on the boat that took more time than expected. However, I can now describe some of the final stages and report that she has been launched!
My varnishing of the bare hull stopped after eight coats and, while not a polished finish, it should be well protected. I was pleased to discover how much smoother the hammered roves became after being covered with multiple layers of varnish. The plans suggested leaving the cedar floorboards bare and untreated, presumably to give a non-slippery surface, but I thought some protection might be wise. I asked for views and advice on a wooden boat forum and was rewarded by a wide range of differing opinions. Unable to accept all suggestions, I settled on the application of a couple of coats of a matt finish oil.
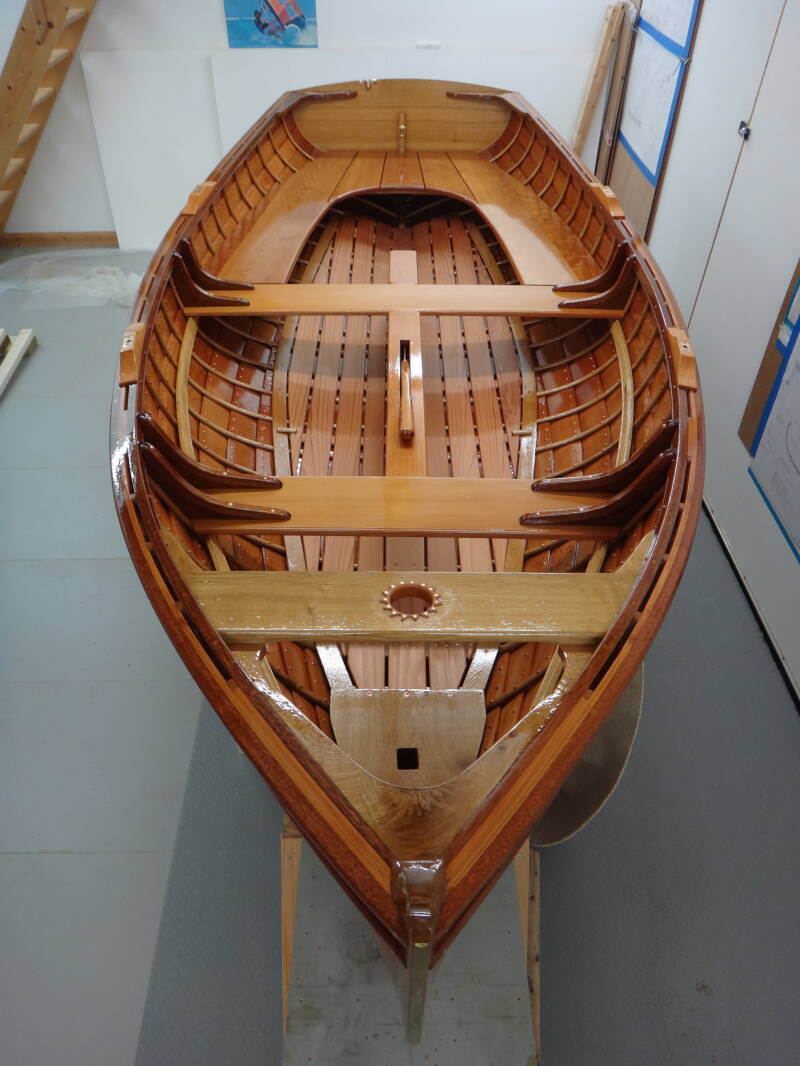
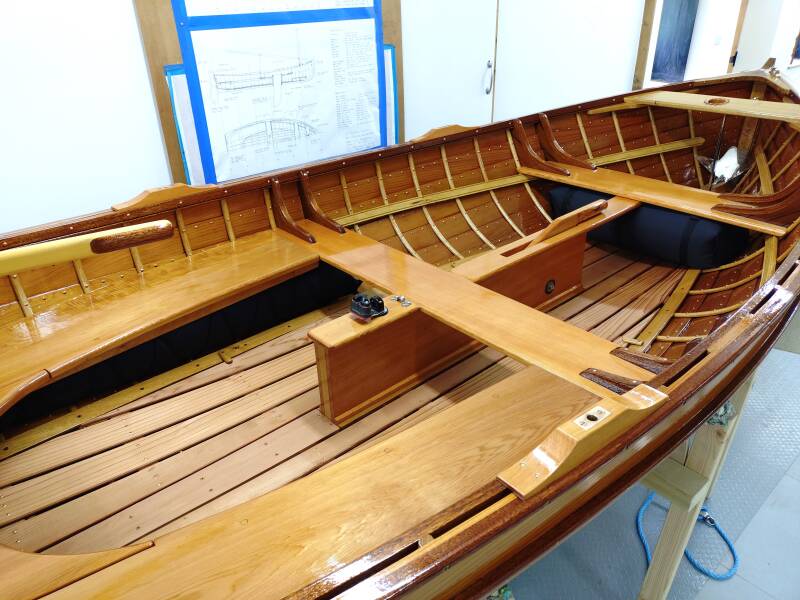
The varnished interior after replacing the internal fittings. The rich colour of the western red cedar contrasts nicely with the oak and douglas fir.
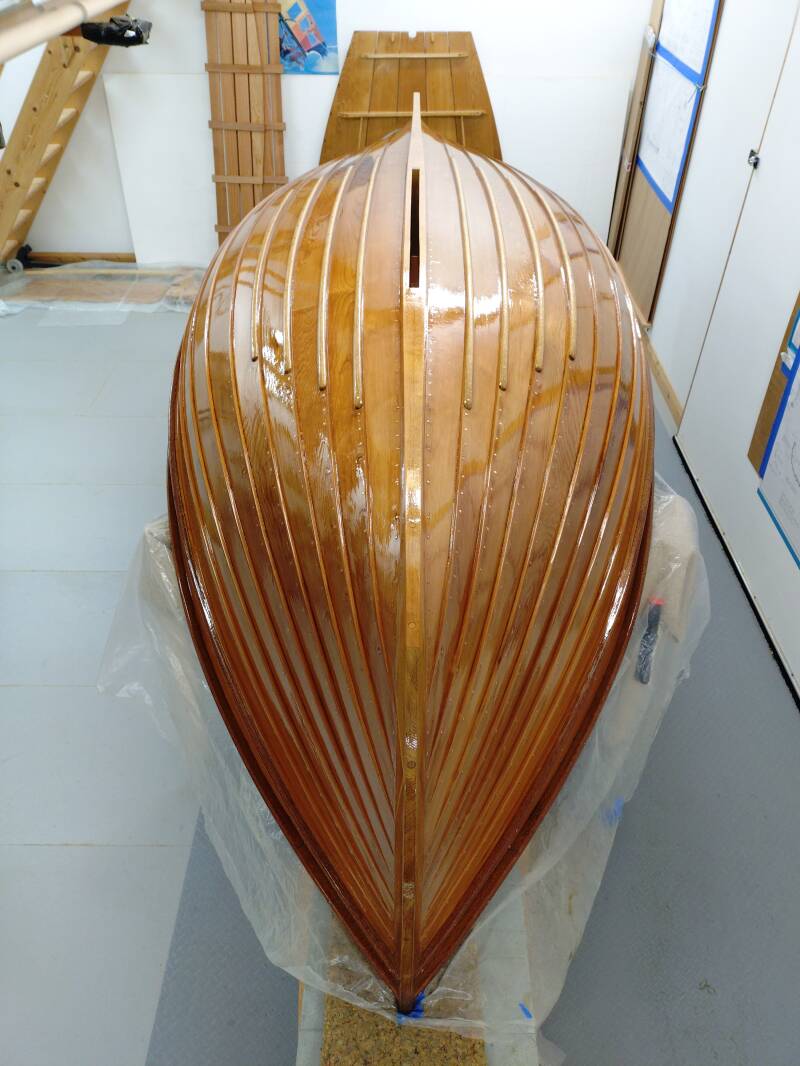
The hull flipped over and varnished.
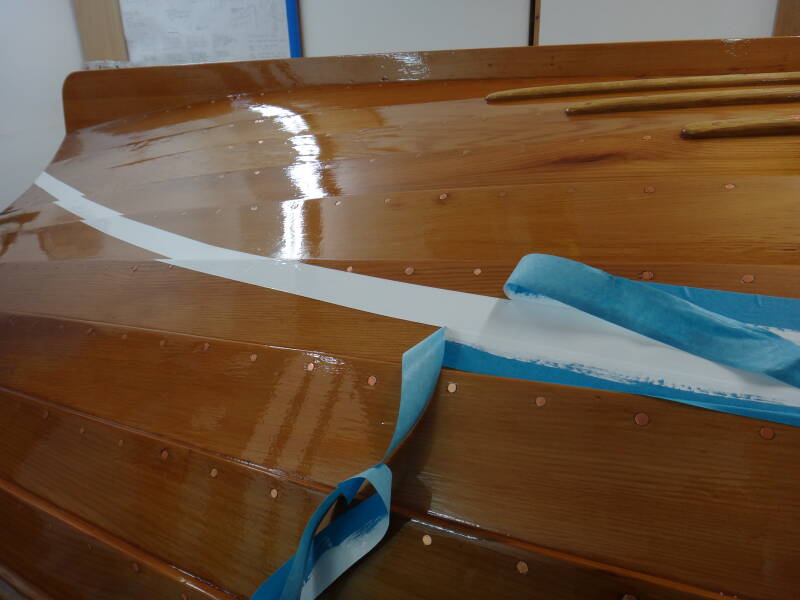
After flipping the boat over for another eight coats of varnish on the outside, I decided to add a waterline. Trying to position this accurately initially involved a laser level and a lot of ‘eyeing up’ but was complicated by Paul Gartside’s advice that it would look better if the line had ‘some spring to it’ by lifting the ends slightly. As the line crosses the junctions between strakes a zig-zag is needed, so careful application of masking tape is required. I didn’t manage to get it quite right but I’m hoping that people won’t be seeing the bottom too often.
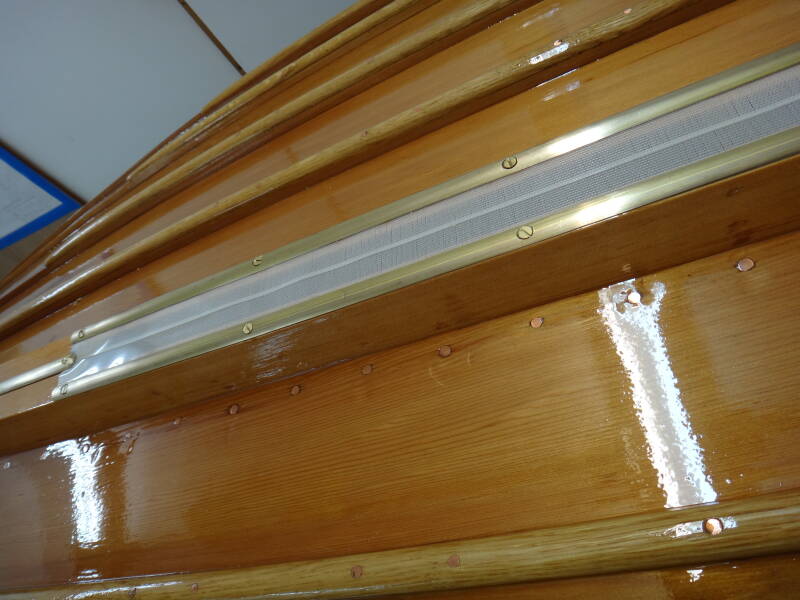
While the boat was upside down I fitted a brass strip along the keel, splitting around the centreboard slot. I also glued slightly overlapping mylar strips across the centreboard slot to try to keep sand and stones out.
Oars
My next job was to make a pair of flat blade oars, so I read several books and articles for advice, including the description by Geoff Bowker in a recent issue of Water Craft (171, pp 48-52). I avoided spoon blade oars as I understand that they make sculling over the stern more difficult. Using the Shaw and Tenney formula (https://www.shawandtenney.com/how-size-your-oars?srsltid=AfmBOoroB9O-MRtn3aoDLjCpsy_SKJ_hweUoim9BWLz6HEm8ADLJXWDx), which apparently they have been using in Maine since 1858, indicated that my oars should be 8ft 6 inches long. I had some nice Sitka Spruce which needed scarfing to achieve this length, with additional pieces added to the sides for the blades. I incorporated some strips of Khaya Mahogany as contrasting colour, as I have done previously when making canoe paddles.
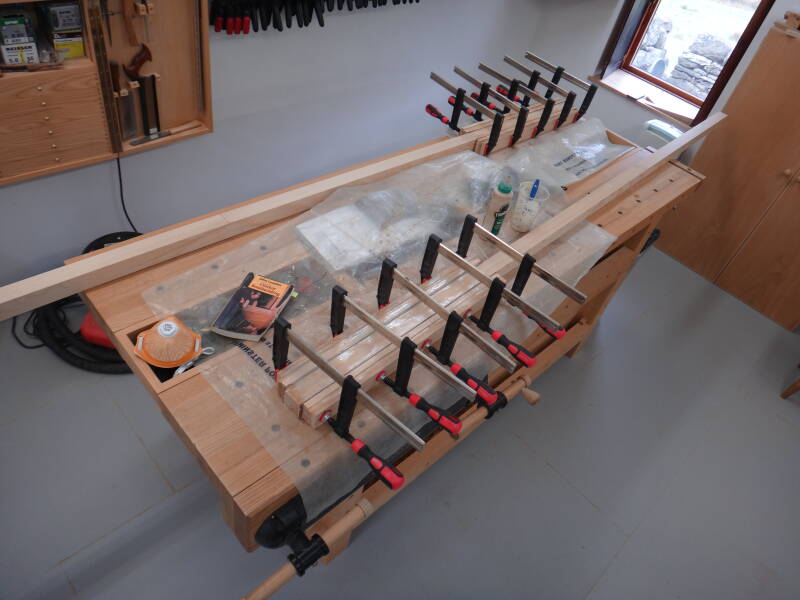
Blanks for two oars glued up with Titebond III and clamped.
Much sawing and shaping followed, with most of the timber ending up on the floor. I tapered and rounded the shafts using the same spar gauge and method as for the spars (see previous articles) but left the section that would be above the level of the rowlocks as 8-sided, just for the sake of the appearance.
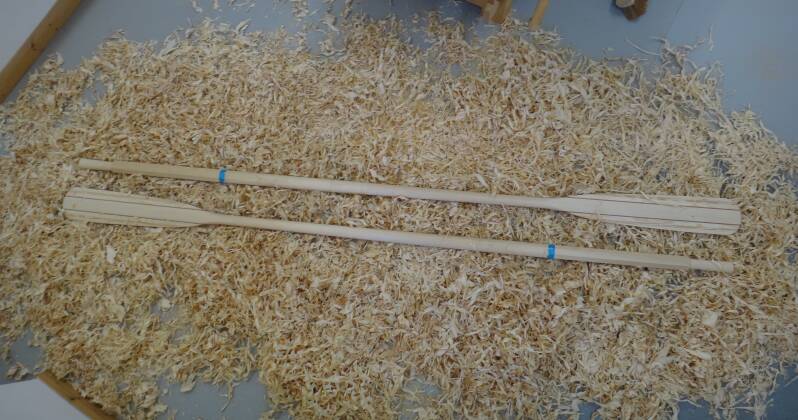
Two small oars amidst a big pile of shavings!
Another tip I picked up when making canoe paddles was to incorporate a piece of aluminium sheet into the end of the blade to support and protect the wood when using it inappropriately – such as for pushing off a beach or pontoon. I’ve found this to be remarkably effective for canoe paddles so why not for oars? It requires a transverse cut across the tip of the blade using a bandsaw, followed by insertion of a roughened piece of aluminium liberally coated with epoxy.
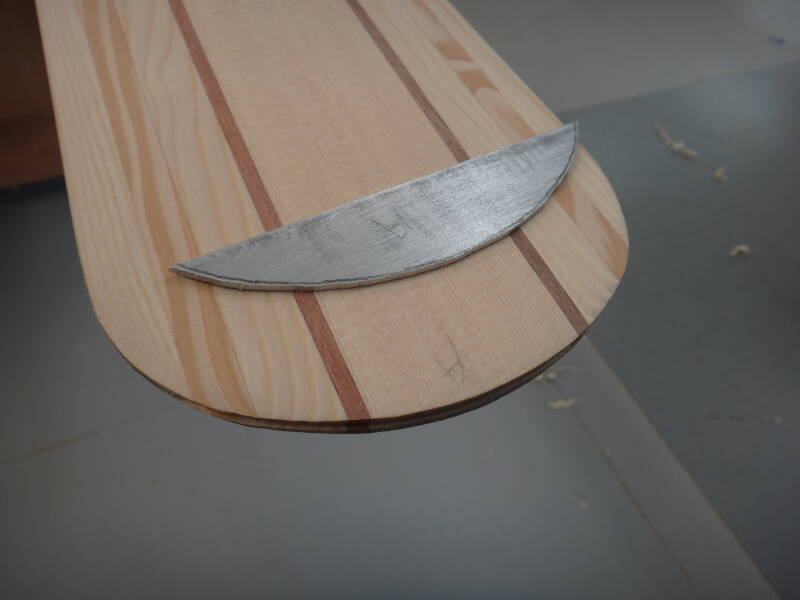
Piece of roughened aluminium ready for insertion into the tip of an oar blade.
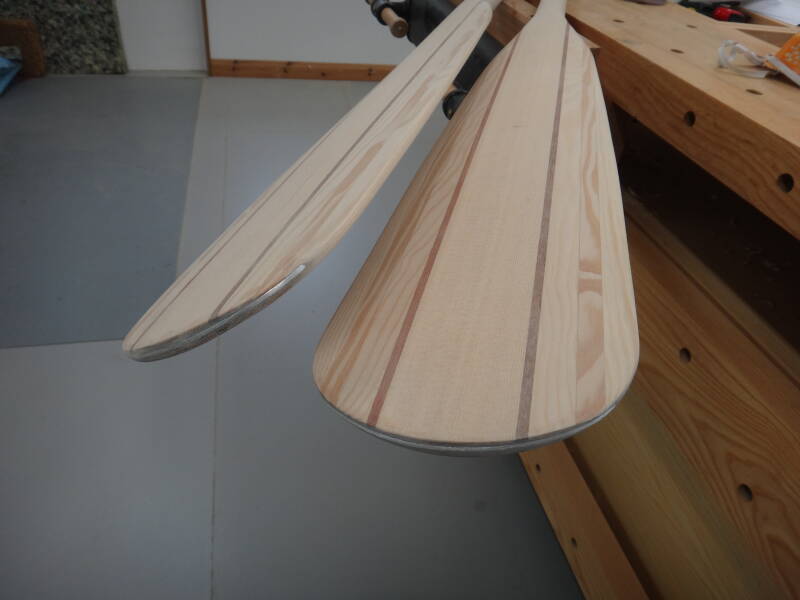
Tips of the two oar blades with the supporting aluminium in place.
Being a novice oarsman, likely to let go of an oar from time to time, I ensured that the oars would only slide into my new bronze rowlocks in the tapered shaft section but then be unable to jump out. This was achieved in part by the thickness of the leathers and the addition of buttons at the end.
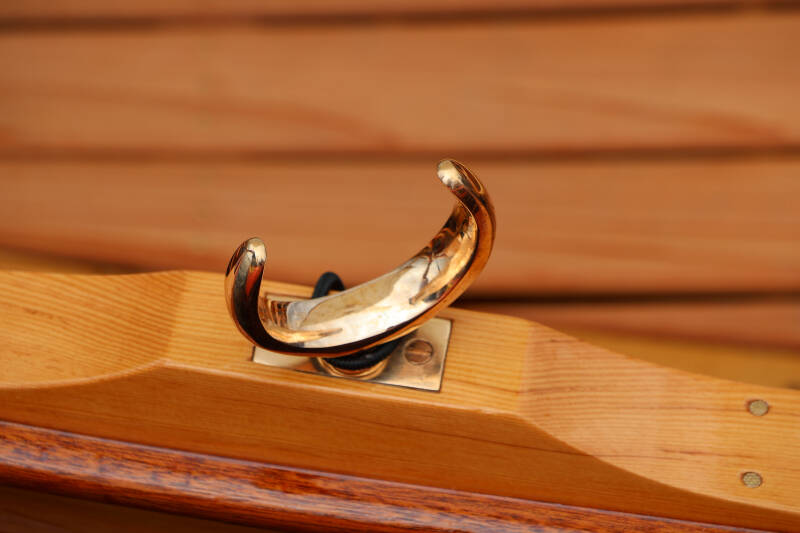
One of the bronze rowlocks. Photo - John Deane
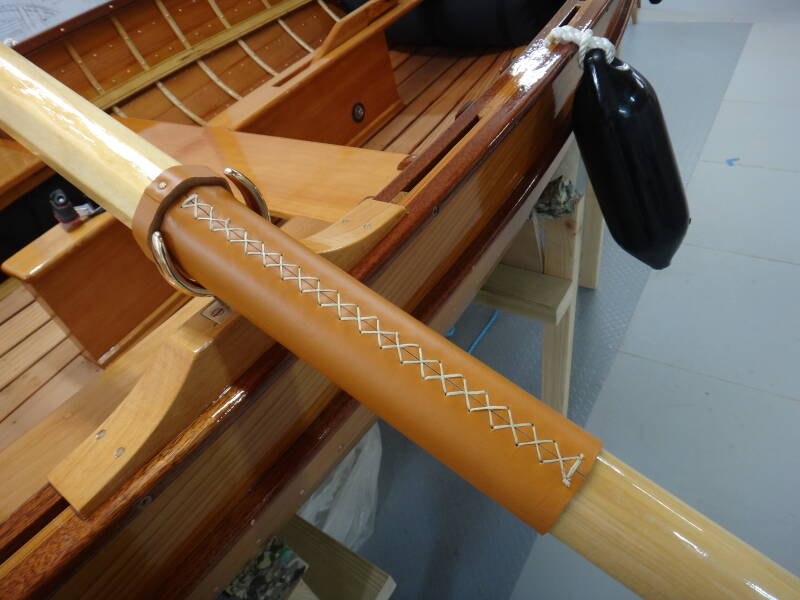
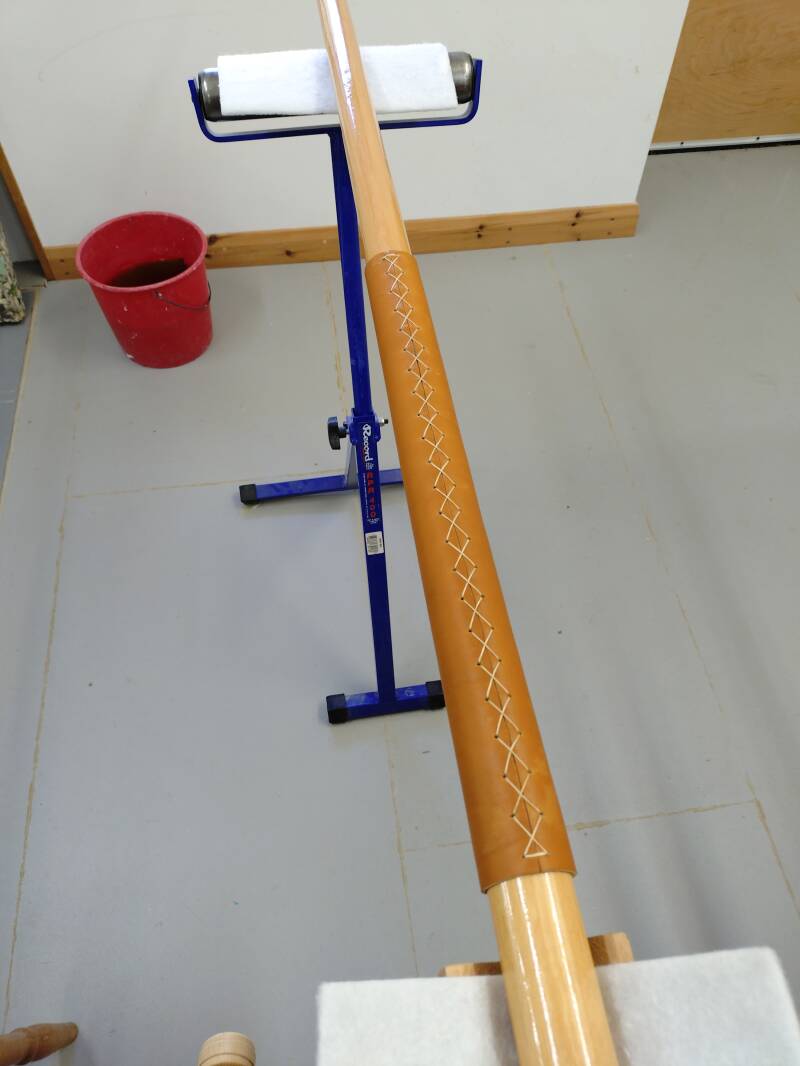
Oar leathers stitched in place with a button (a wider leather ring) to stop the oar from sliding through.
Bits and pieces.
Having learnt how to leather the oars by watching several excellent online videos, I used my newly acquired skills to leather the boom, yard and mast bench. I used 2.5mm vegetable tanned cowhide and found that about an hour in warm water was sufficient to make it sufficiently soft and pliable to use.
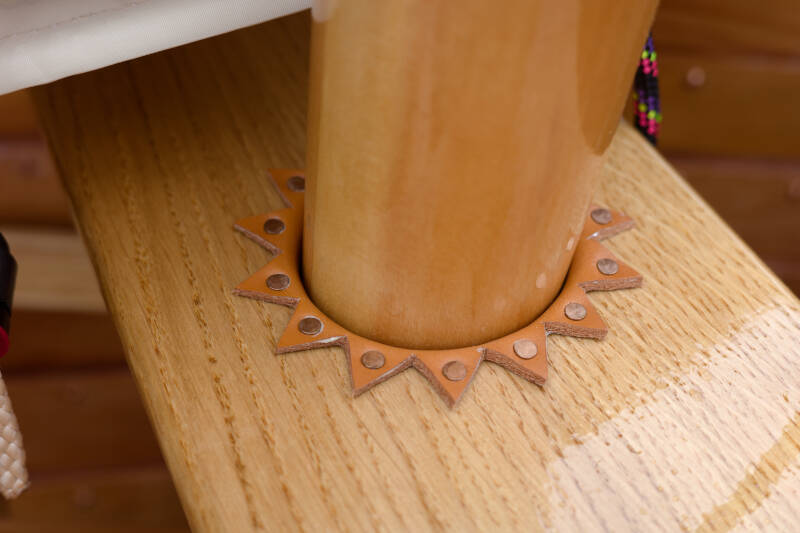
The leathered yard and mast bench (above photo Simon Knight).
A kind friend gave me a stainless-steel Bruce (claw) anchor and warned me of the potential hazards of stepping on it in the bottom of the boat, so I wanted a convenient storage position. This was achieved by a shaped wooden bracket that holds the anchor vertically in the bow, with the chain and line tucked in behind.
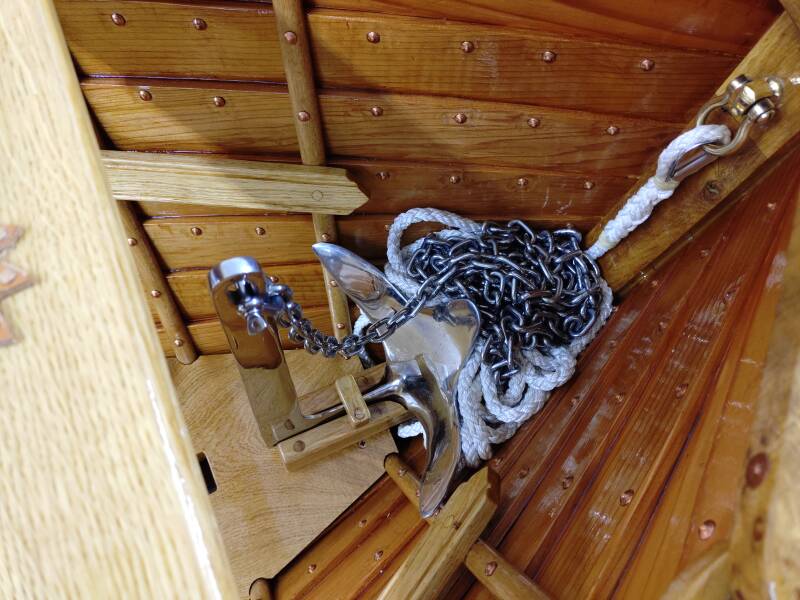
The anchor and rode held in the bow by a bracket and toggle on the mast step.
The rigging of my beautifully made new sail (R & J Sails, Clevedon) largely followed the guidance on balanced lug rig set-up found on Michael Storer’s website (https://www.storerboatplans.com/category/tuning/lug-rig-setup/). Michael emphasises the importance of a powerful downhaul and the simple use of lines to keep the yard and boom close to the unstayed mast. At this point my adherence to traditional construction was abandoned in favour of the modern blocks, jammers, clamcleats and coloured lines I was used to. I expect we all make different judgements on the importance of traditional authenticity!
As I will be sailing single handed for much of the time, and don’t anticipate much help from Sprout the dog, I want to be able to let go of the tiller. I therefore fitted a helm impeder, as originally described by John Huntingford. This simple idea takes a cross-boat line through an eye strap on the tiller, where it is clipped to a section of bungee cord which can be adjusted to allow varying degrees of tension. It should provide sufficient tension to hold the tiller in any chosen position.

My version of John Huntingford’s helm impeder.
I was keen to add some buoyancy to help after the inevitable capsize so have put custom-made air bags beneath the side seats and front thwart. They were made by Bob Howes at BPM Whitewater who was extremely helpful and did a great job.
Airbags beneath the side seats and front thwart.
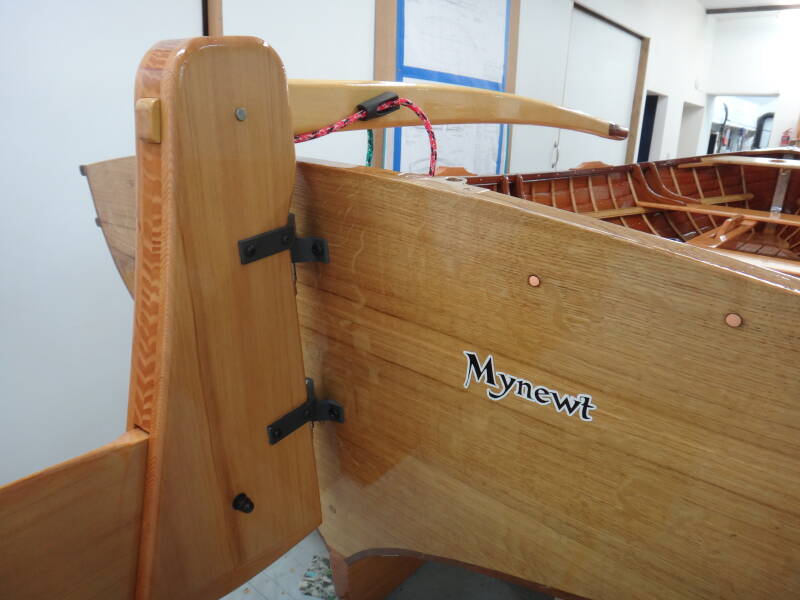
After finally lowering my dinghy off its building platform and down to floor level, I realised how small it was, and what an interesting challenge it will be for me and Sprout to sleep aboard on multi-day trips. This thought confirmed the name, now added to the transom.
The Launch
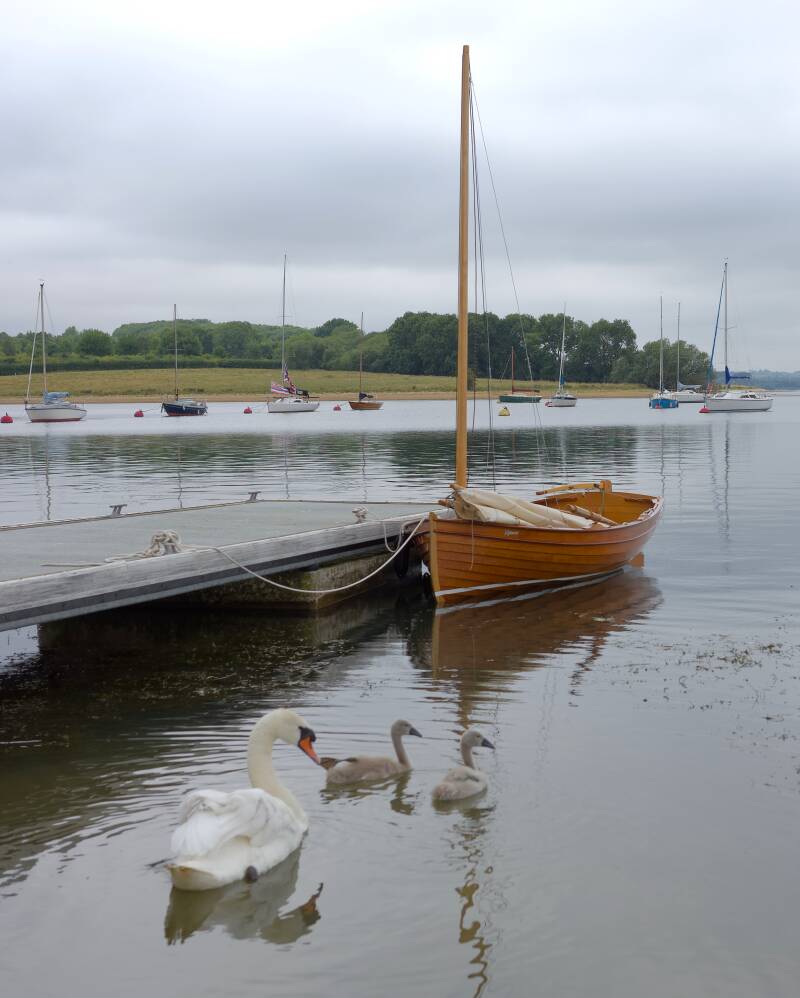
The final delays to launching can be blamed on the need for a towbar on my car and a trailer to put on it. Tony at Admiral Trailers was extremely helpful and answered all my daft questions, so my new combi trailer was collected from Devon and used to bring Mynewt out from the workshop. After a couple of sessions of ‘lawn sailing’ to adjust the rigging, a day was chosen to visit Rutland Water. Despite my incompetent reversing skills we eventually got down the slipway and she entered the water.
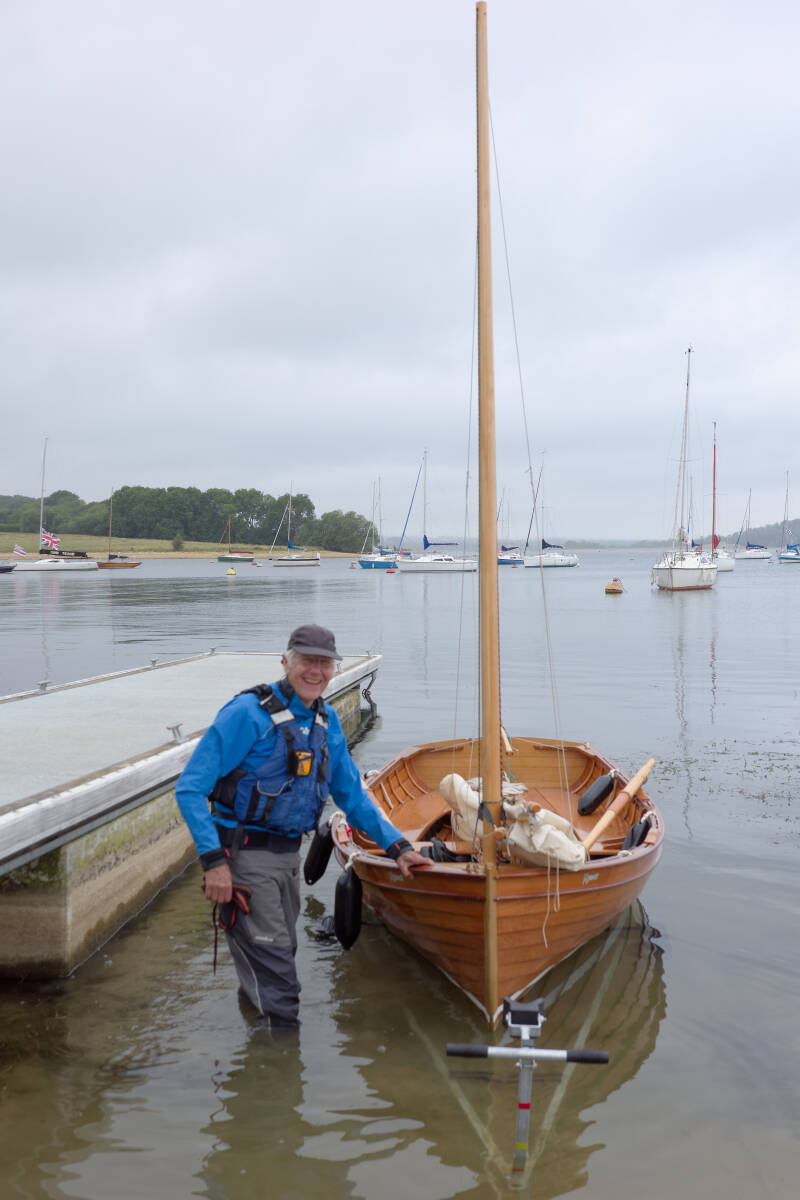
The first wetting of the hull. Photo Simon Knight
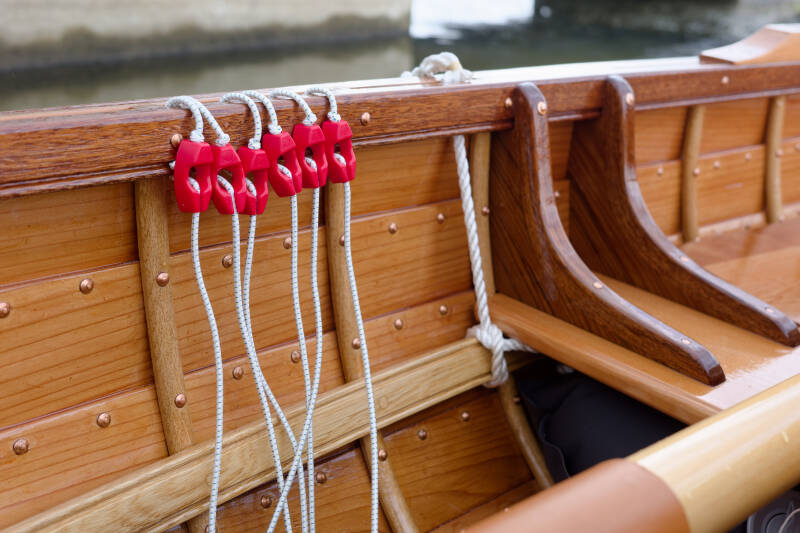
Ties ready to wrap together the sail, yard and boom when dropped into lazy jacks. Photo Simon Knight
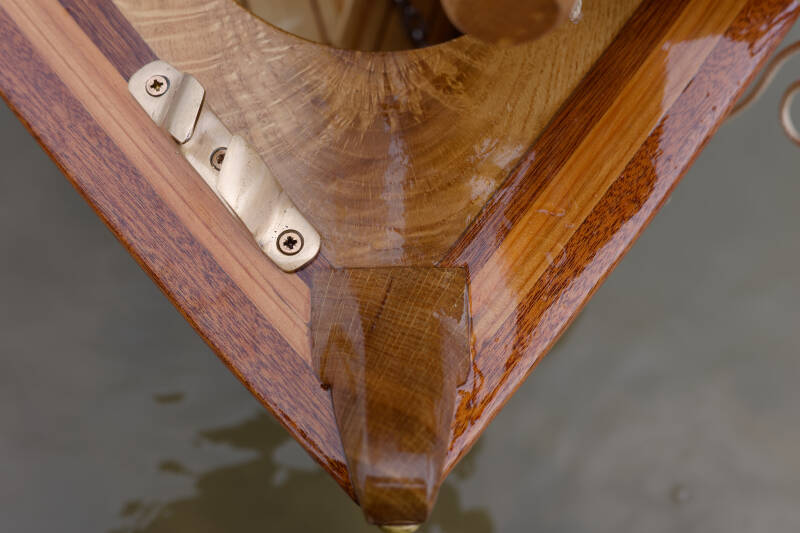
Oak, Mahogany, Cedar and bronze. Photo Simon Knight
Unfortunately, the promised winds never fully materialised but we managed a short trip, long enough to create a list of about a dozen things that need to be adjusted or changed. Sailing seems to come with the need to make improvements after each outing! But she seems to handle well, be nicely balanced and responsive. And, most importantly, she didn’t leak!
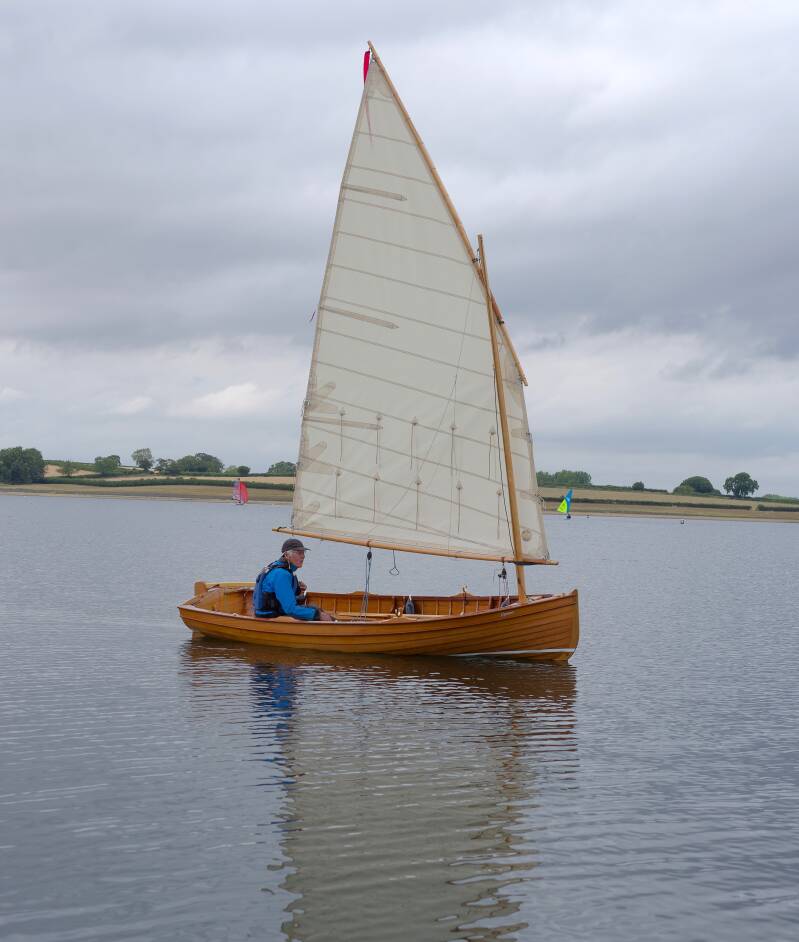
Ready, but no wind. Photos Simon Knight
Create Your Own Website With Webador